Workflow Editor
With the Workflow Editor you can create, select and modify workflows.
To open it, select .
Note: In case the Workflow Editor is by default set to view only, you cannot edit any
workflows. Select the lock icon on the left of the workflow name to unlock the Workflow
Editor and edit the workflow or the nodes. Select the icon again to lock the workflow to
prevent accidental user edits in the Workflow Editor. You can manage the default behavior of
the Workflow Editor protection in
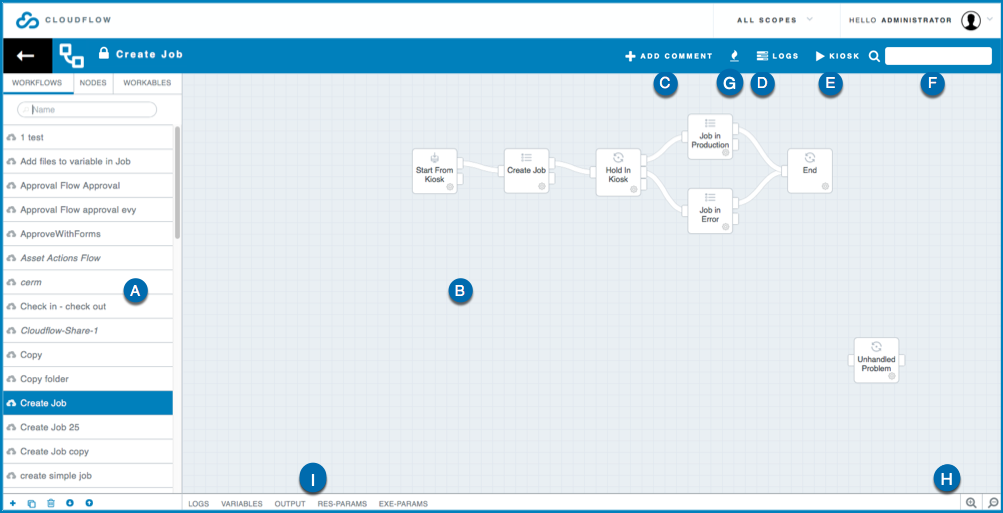
.It consists of the following parts:
- A: the workflow list, where all the workflows are listed. If you select a
workflow, it is displayed in blue.
- Select
 at
the bottom to add a new workflow. A new entry will appear in the list, you can change
the name of the workflow by double-clicking the name in the list, and entering a new
one. See Building a workflow for more detailed information on how to
build workflows.
at
the bottom to add a new workflow. A new entry will appear in the list, you can change
the name of the workflow by double-clicking the name in the list, and entering a new
one. See Building a workflow for more detailed information on how to
build workflows. - Select
 to
copy an existing workflow. If you copy a workflow, the hotfolders will be disabled in
the copied workflow.
to
copy an existing workflow. If you copy a workflow, the hotfolders will be disabled in
the copied workflow. - Select
 to
remove an existing workflow. It is not possible to remove a workflow with running
jobs.
to
remove an existing workflow. It is not possible to remove a workflow with running
jobs. - Select
 to export an existing workflow.
 - Select
 to import an existing workflow.
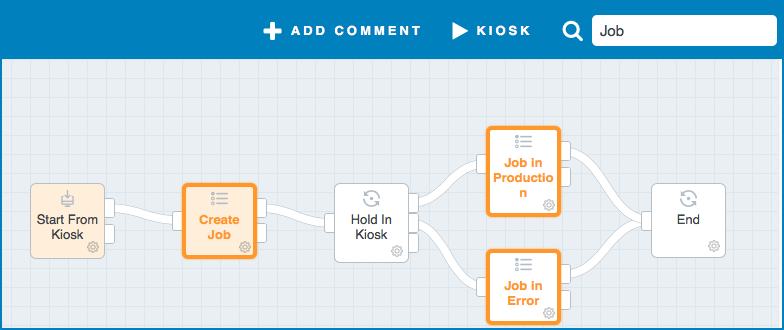
You can use the quick search on top of the workflow list to search for workflows:- If the query matches a workflow name or a part of a name, the list is filtered by the matching workflows and the query is highlighted in yellow.
- If the query matches node name or a part of a name, the list is filtered by the workflows that contain nodes with the matching name and a magnifier icon appears.
Example
In this example, the query Jobs has the following result:
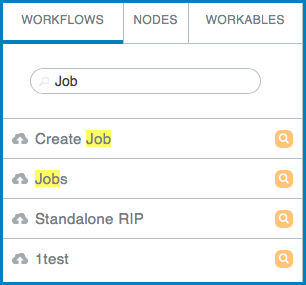
- The query matches two workflows because Jobs is present in the name of the workflows (Create Job and Jobs).
- The query matches four workflows because Jobs is present in one or more node names or types in the workflows.
- Select
- B: the workflow area, which is the graphical representation of the currently
selected workflow. By manipulating this graphic, the workflow can be changed:
- Extra workflow steps can be added.
- A workflow step can be connected or disconnected from another to change the processing flow.
- Each step can be configured with different parameters.
- …
See Building a workflow for more information.
- C: Add Comment. With this button, you can add a comment to
the selected workflow.
- Select + to add a comment. A text box will appear.
- If you hover over the text box, a pencil will appear.
- Select the pencil to edit the comment.
- Select the text box to move or resize the comment field.
- Select the text box and press the Delete button to delete the comment.
- D: Logs. With this button, you can view the timeline of the selected workable. Each workable has its own timeline. If you select a different timeline, the corresponding workable is selected in the workflow.
- E: KIOSK. With this button you can access
KIOSK and submit a job to the selected workflow. Follow these steps:
- Select the workflow you want to submit to from the workflow list on the left.
- Select the KIOSK button (
 ) on the top right
in the workflow area.
) on the top right
in the workflow area. - Select the Input.
- If needed, provide extra parameters for the workflow. See Form Builder for more information on how to predefine these parameters.
- Browse to the file(s) or select them from a File store. See Enable File store browsing in the Start from KIOSK node for more information on file uploading.
- Select Submit.
You can also use this for workflows that start with the Start From Web Request node. In that case, you can add extra input options to the workflow:- Key (path): here you can define the key (path) of the variable that you want to pass to the workflow. You can use dot notation.
- data type: here you can define the data type to interpret the data.
- Value: here you can define the value of the key variable that you want to pass to the workflow.
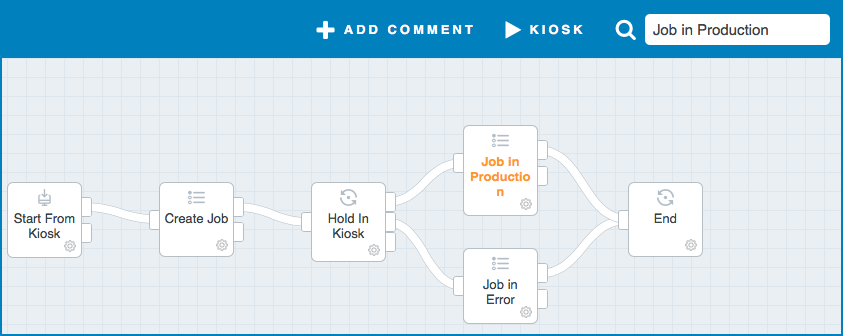
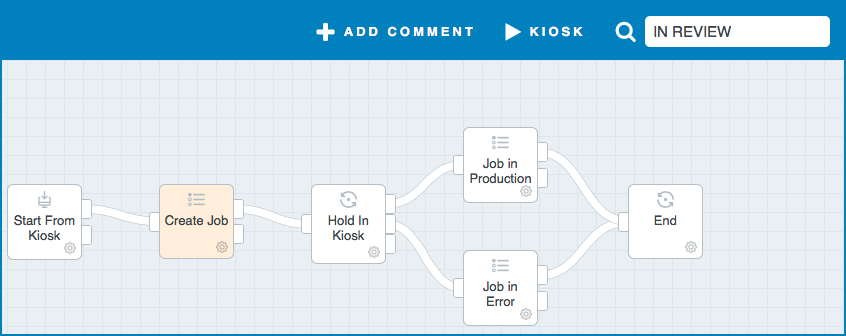
- F: the Quick search field where you can enter a search
string.
- An orange font in the node name indicates that the query is found in the node
name .
For example Job in Production
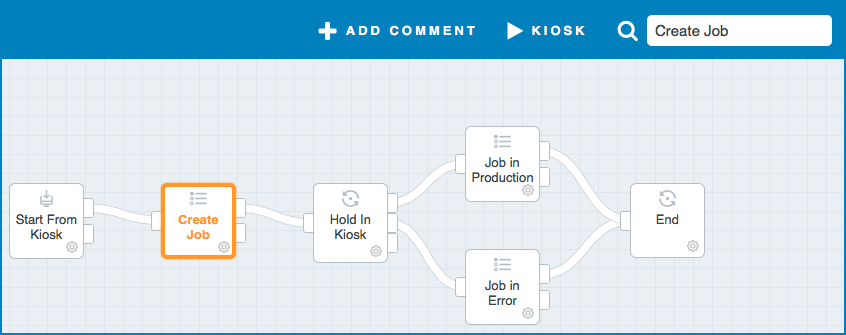
- An orange border around the node indicates that the query is found in the node
type.
For example Create Job.
The node type depends on the language of the CLOUDFLOW User Interface. For example, in a French User Interface, the End node type is Fin and the query End will not have any results.
- An orange colored node indicates that the query is found in the field values
of the node.
For example In Review (because the State field value is IN REVIEW).
- An orange font in the node name indicates that the query is found in the node
name .
- G: heatmap: the heatmap indicates the processing time of
the workable in each node of the workflow. If you draw a heatmap, the nodes (except for
some nodes such as for example the Start,
End, Hold In Kiosk, Wait For
Approval … nodes and nodes that take more than 24 hours for the workable to
be processed) will appear in a color that varies from dark green to dark red. The node
that is colored in dark green is the node with the fastest processing time, while the node
that is colored in dark red is the node with the slowest processing time. The other nodes
are painted in a color between dark green and dark red, depending on the processing time.
In case of differences, a legend is shown in the topbar:
 Note: The processing time of the nodes is relative to the run time of the workable in the workflow and does not depend on the system. For example, this means that a red node does not necessarily mean that it is problematic, it just means that it is a the processing was slow compared to the processing times of the other nodes.
 - H: Zoom: with these buttons you can zoom in and zoom out in the Workflow Editor.
- I: Debug area: see Debug area for more information.
Note: Some workflows that are based on a template have a checkbox Auto
update (for example Standalone RIP). If you select the
checkbox, the workflow will be reset to the default system setting when CLOUDFLOW is
updated. This means that all changes to the template based workflows are lost with every
CLOUDFLOW update. If you want to keep the changes, make sure to leave the checkbox
Auto update unselected.
Note: When saving a workflow, a small rotating icon is visible on left of the zoom button,
until the saving is done.