In the WORKABLES tab, you can see an overview of the
jackets and workables.
When you have submitted a job to a workflow, a jacket and a workable are
created.
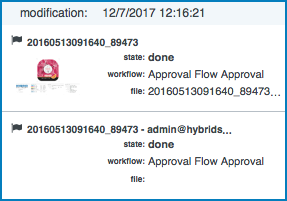
Jackets list
The WORKABLES tab provides a list of the jackets in the selected
workflow.
On the bottom, you can activate various filters on the list:
hides the
old jackets. These are the jackets that existed before selecting the icon. If you submit
a new job while the filter is active, the new jacket is displayed in the list.
shows all
jackets that contain a workable with an error state.
shows all
jackets that contain running workables.
Note: You can activate various filters at the same time.
If you select a jacket, you can delete () and download () it.
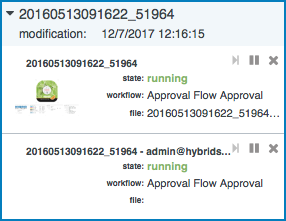
Workables
If you select a jacket, it opens and it shows an overview of the workables in the
jacket:
Workables can have two different states:
running: this means that the workable is still running. In this case, you can perform actions on the workable:
: if you select
this icon, the workable will be paused at its current the location. The icon will
change into .
: if you select
this icon, the workable will start running again.
: if you
select this icon, the currently paused workable will move one workable.
: if
you select this icon, the workable will be deleted.
done: this means that the workable has reached its end point.
You cannot perform any action on the workable.
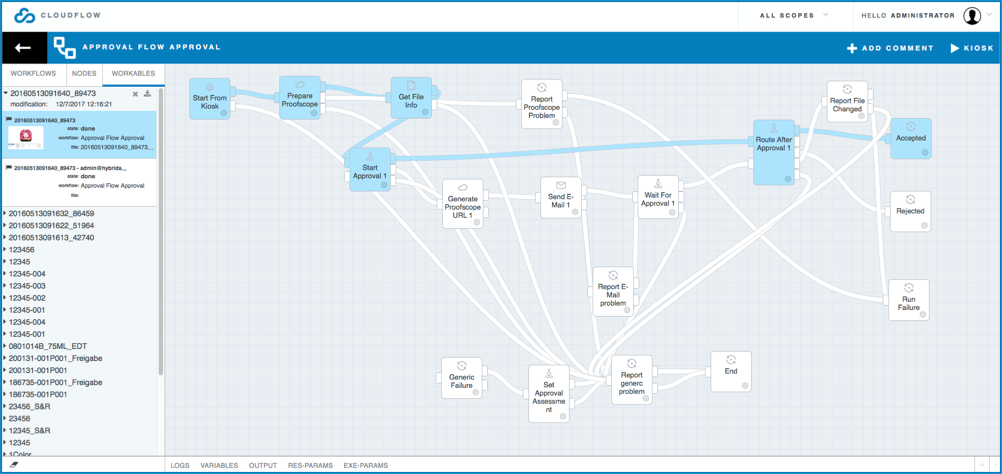
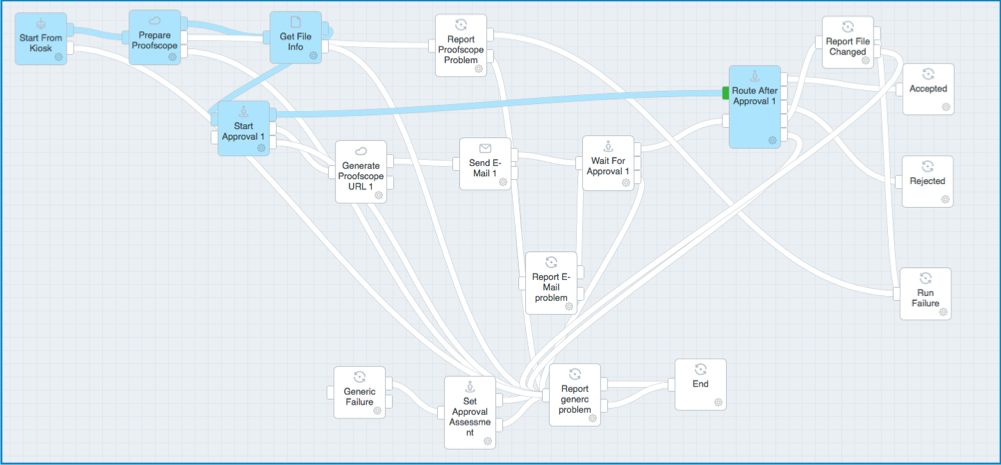
Representation in the workflow area
When you select a workable, it becomes visible in the workflow area. The blue line
represents the workable path:
If the workable is still running, a green dot indicates the current position of the
workable:
When the workflow is stopped, for example in case of an error, you can move this green dot
to another node. If you select , the workflow is restarted from this location without having to reload the job.
Debug area
At the bottom, extra options are available with information about the selected workable.
These buttons are used mainly for debugging reasons. Select to copy the content of the panel as text to the clipboard.
To view the information, select a workable and one of the available options:
LOGS: here you can see log information of the selected node. If
the log contains encoded CLOUDFLOW URLs, you can hover to see the decoded forms.
VARIABLES: here you can see an overview of the variables that
have been generated by the workflow at the moment of the current position of the
workable. Variables that not yet have been created are not listed.
OUTPUT: here you can see an overview of the output data
generated by the selected node. There are three types of output:
References: the datatype is an object with key files and the value is an
array of file URLs.
Variables: the datatype is an object with a key and a value.
Data: the datatype is an array containing objects with two keys: type and
URL.
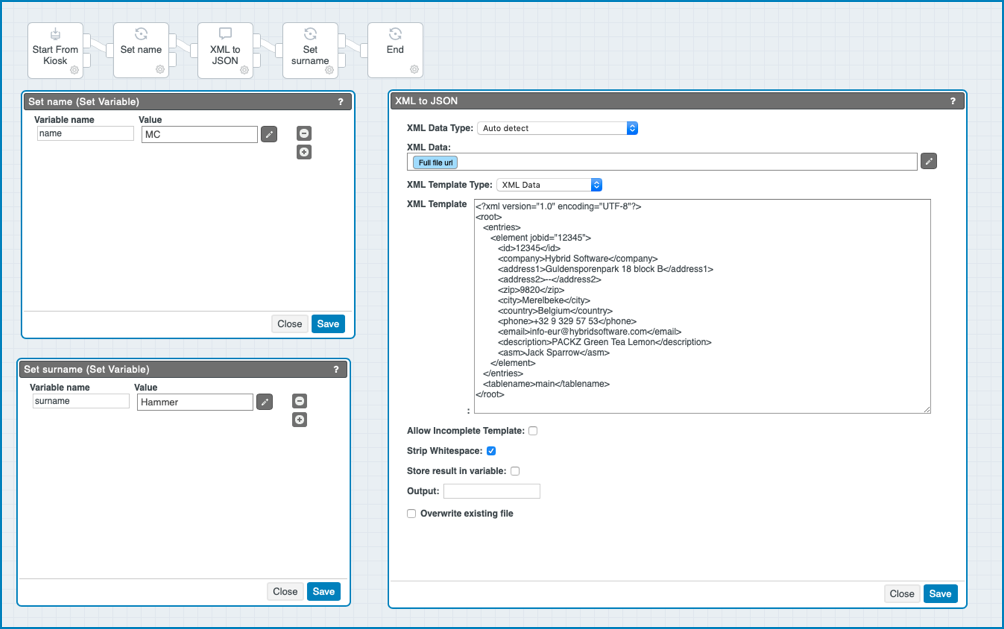
Example
You have the following example workflow with the following parameters:You run the following XML file through the
workflow:
The resolved output is calculated but it is not stored in the workable. It
is accessible for File from node and Data in
Container from previous. You can also define the node name in stead of
previous, but it will use what is available as resolved output from that node. This
means that references and data are kept when a node does not generate either files or
data. In the example above, the output and resolved output from the Start
from Kiosk node will always be the same, as this node is the first one.
If you select the Set name node, the resolved output looks like
this:
This
node didn't generate any references, however they are still available, so resolved
means what is available at that time. It will also combine the output with the output
which the node created, this is the variable name. This is rather redundant as
variables are always direct accessible. The XML to JSON node
will use that reference, as the XML Data is set to use the full file URL from the
previous node. The XML to JSON node only generates data, but
the resolved output shows
this:
To
summarize: resolved data can be the above three types of output, and will not change
if a node doesn't change them, except for variables. Data is the content of the data
in container.
RES-PARAMETERS: here you can see the RES parameters of the
selected node.
EXE-PARAMETERS: here you can see the EXE parameters of the
selected node.
ADD BREAK: with this button you can add a break to a selected
node to make the workable stop at that specific node. This can be useful for testing
reasons. Select REMOVE BREAK to remove the break.
 hides the
old jackets. These are the jackets that existed before selecting the icon. If you submit
a new job while the filter is active, the new jacket is displayed in the list.
hides the
old jackets. These are the jackets that existed before selecting the icon. If you submit
a new job while the filter is active, the new jacket is displayed in the list. shows all
jackets that contain a workable with an error state.
shows all
jackets that contain a workable with an error state. shows all
jackets that contain running workables.
shows all
jackets that contain running workables. ) and download (
 ) it.
) it.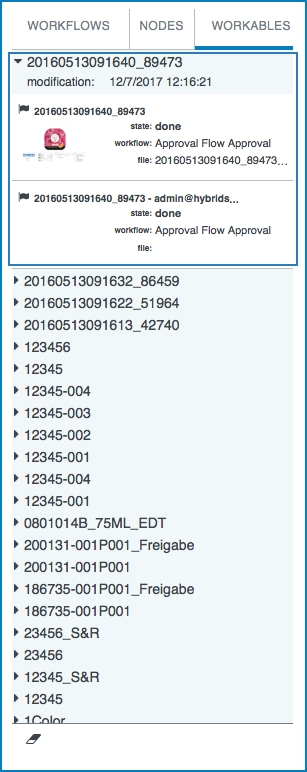
 : if you select
this icon, the workable will be paused at its current the location. The icon will
change into
: if you select
this icon, the workable will be paused at its current the location. The icon will
change into  .
. : if you
select this icon, the currently paused workable will move one workable.
: if you
select this icon, the currently paused workable will move one workable.