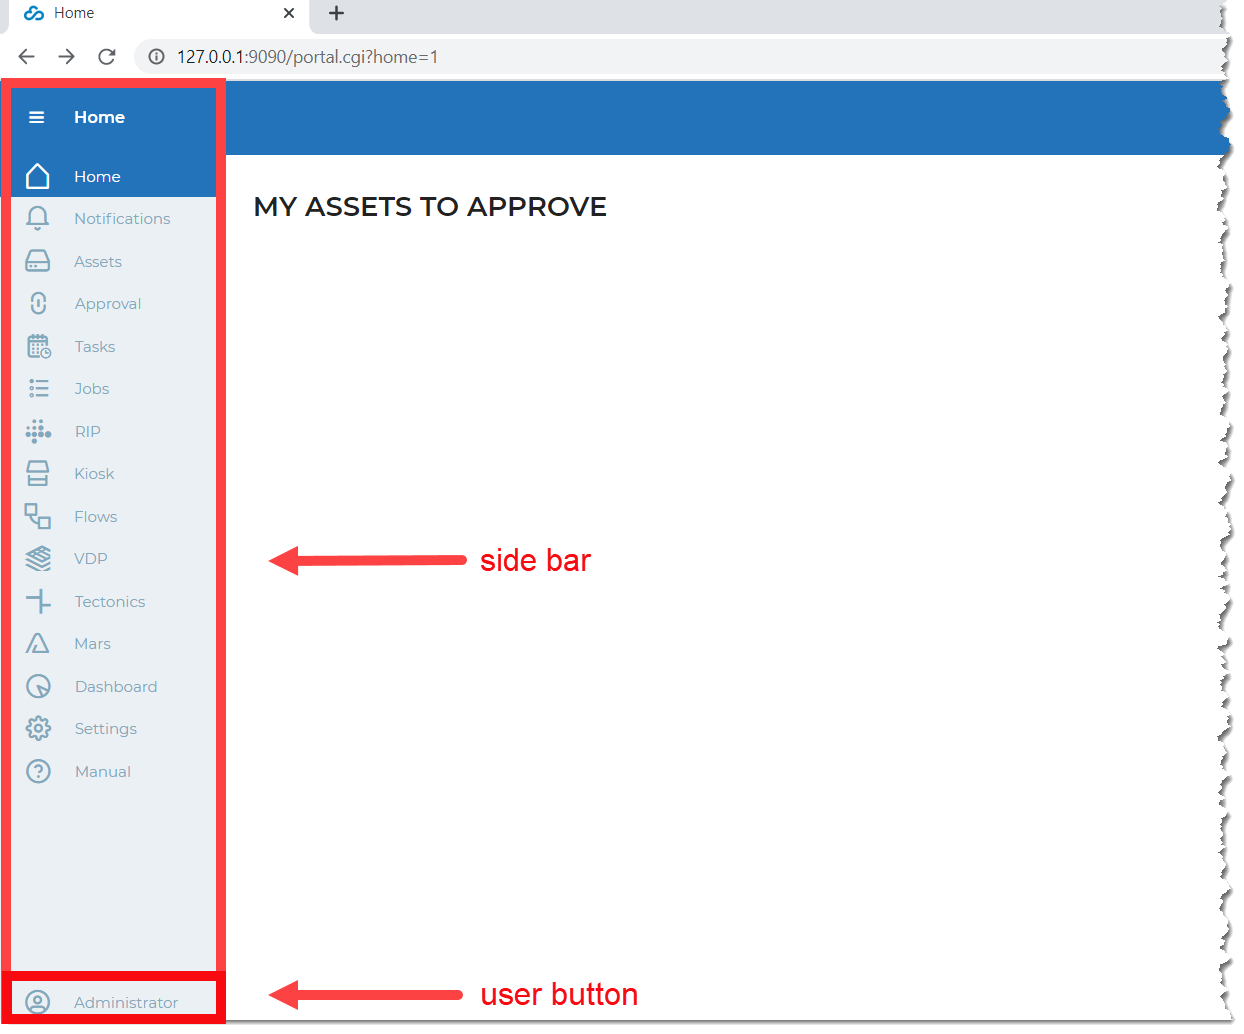
Side bar
The Nebula Side bar is the gateway to CLOUDFLOW's modules and functionalities.
Via the Nebula Side bar the user can access CLOUDFLOW's modules and functionalities. The Side bar is customizable.
DEFAULT MODULES
- Home: This item links to the Home page page.
- Notifications: This item links to the Notifications page.
- Assets: This item links to the Assets page.
- Approval: This Item links to the Approval page.
- Tasks: This item links to the Tasks page.
- Jobs: This item links to the Jobs page.
- Rip: This item links to the Rip page.
- Kiosk: This item links to the Kiosk page.
- Flows: This item links to the Workflows page.
- VDP: This item links to the VDP page.
- Tectonics: This item links to the Tectonics page.
- Mars: This item links to the Mars page.
- Dashboard: This item links to the Dashboard page.
- Settings: This item links to the Settings page.
- Manual: This item links to the Manual page.
USER BUTTON
- Log Out: Here you can safely log out of CLOUDFLOW.
- All Scopes: Here you can select a scope that is available for your user profile.
- Preferences: Here you can define user preferences.
These override the global settings of #14 above.
- Localization: Language: here you can define the user interface language.
- Units:
- Length: here you can define the length unit. In the decimal precision field you can define the number of digits after the decimal mark.
- Small Length: here you can define the length unit of small distances. In the decimal precision field you can define the number of digits after the decimal mark.
- Distortion: here you can define the distortion unit. In the decimal precision field you can define the number of digits after the decimal mark.
- Scaling: here you can specify the (fixed) scaling to use while printing the file.
- Text: here you can define the text unit. In the decimal precision field you can define the number of digits after the decimal mark.
- Resolution: here you can define the resolution unit. In the decimal precision field you can define the number of digits after the decimal mark.
- Ruling: here you can define the ruling unit. In the decimal precision field you can define the number of digits after the decimal mark.
- Change password: Here you can define and change your password.
- Proofscope: Live Rendering: enable this slider to render in real-time.
- Versions
- CLOUDFLOW: here you can see your CLOUDFLOW version.
- PACKZFLOW: here you can see your PACKZFLOW version.
ADD / DELETE MENU ITEMS
In the sidebar links to functionalities can be added and removed.
To do so, follow these instructions:
- On your Windows keyboard, press ALT+SHIFT.
- Move your cursor to the bottom left corner of the sidebar menu.
The User name indication will disappear and a pencil icon will be displayed.


- Click the pencil icon.
The Edit the menu window is displayed.
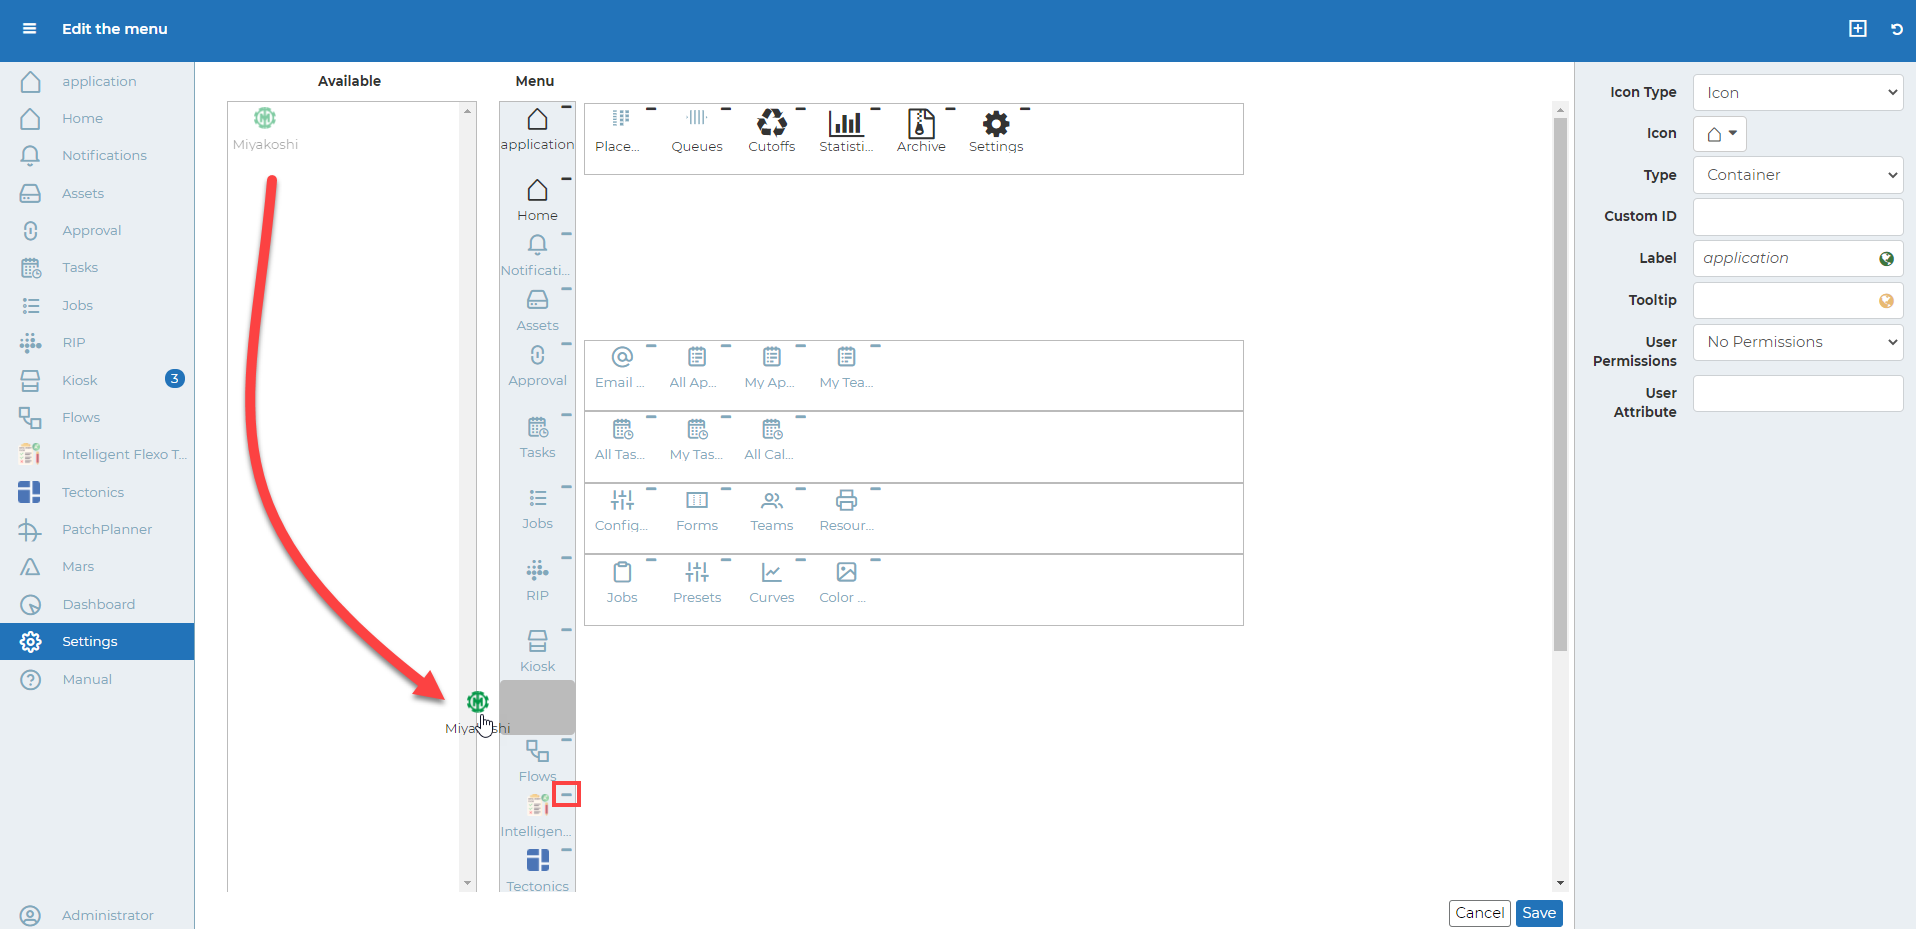
- To add an available functionality to the menu, drag it to the middle Menu to a location where you want it to sit in the sidebar menu.
- To delete a functionality from the menu, click its delete dash and it will snap back to the Available column.
- Click Save.
CREATE / EDIT MENU ITEMS
In the sidebar the new links to functionalities can be created and existing links can be edited. Note that Default links cannot be edited.
To do so, follow these instructions:
- Follow the above steps 1 to 3.
- To edit items, select one in the Menu column and proceed with step 4.
- To create items, click the Add new button
 .
.In the Menu column an item named Application is added. Select it.
- In the pane below select as Icon type either an Icon or an Image of your choice.
- As Type either point to a Link or define a Container
- To name or rename, in the Label field enter the new name.
- To provide a tooltip, in the Tooltip field enter a
short description. Note: Both Label and Tooltip should be translated. Click the corresponding globe icon
 or
or  and enter
translations.
and enter
translations. - Under User Permissions define one or more permissions limiting which users will be able to see/access that same menu item (across scopes).
- Under User Attribute define one or more attributes
limiting that only users with that attribute will be able to see/access that
same menu item (across scopes).Note: User Attributes first appear in blue. Only after you click Save do they become active.
- Click Save.
RESET MENU
Prior customisation can be easily undone by clicking the Factory
Reset button  .
.
- cancel: cancel reset.
- continue editing: current menu items will be replaced by the default menu and the menu stays customised.
- quit customisation: current menu items will be reset to the default menu and in the main settings the check box customised menu will be deactivated.