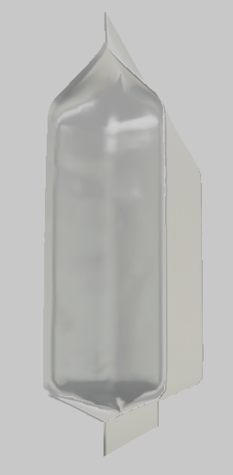
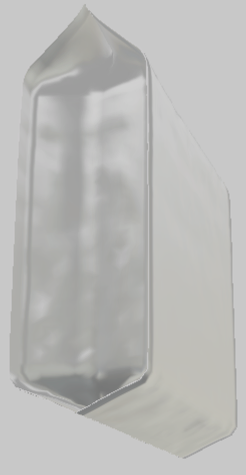
Create 3D Bag
With this node you can create a 3D preview of a bag, based on various dimensions.
It has the following configuration options:
- Input File: here you can define the input file. Select the pencil to open Expression Builder.
Style
- Base Flap Style: here you can define the style of the
base flap. Options:
- Vertical: if you select this option, the base
flap will be positioned in a vertical direction.
- Turned under: if you select this option, the
base flap will be turned under the bag.
- Vertical: if you select this option, the base
flap will be positioned in a vertical direction.
- Fill Type: here you can select the fill type.
Options:
- Light: if you select this option, the fill will be of a light type.
- Medium: if you select this option, the fill will be of a medium type.
- Heavy: if you select this option, the fill will be of a heavy type.
- Square: if you select this option, the fill will be of a square type.
- Fill Amount: here you can define the Fill Amount with a value from 0 to 100, where 0 simulates a bag without any content and 100 shows a full bag.
Seals
Seals are areas of the (printed) substrate that will be joined together to prevent
leakage of the content.
- Top Seal Style: here you can define the style of the
top seal. Options:
- None: if you select this option, no style will be applied.
- Vertical: if you select this option, a vertical ribbed pattern will be applied.
- Horizontal: if you select this option, a horizontal ribbed pattern will be applied.
- Diagonal Left: if you select this option, a diagonal left ribbed pattern will be applies.
- Diagonal Right: if you select this option, a diagonal right ribbed pattern will be applied.
- Bottom Seal Style: here you can define the style of
the bottom seal. Options:
- None: if you select this option, no style will be applied.
- Vertical: if you select this option, a vertical ribbed pattern will be applied.
- Horizontal: if you select this option, a horizontal ribbed pattern will be applied.
- Diagonal Left: if you select this option, a diagonal left ribbed pattern will be applies.
- Diagonal Right: if you select this option, a diagonal right ribbed pattern will be applied.
- Right Seal Style: here you can define the style of
the right seal. Options:
- None: if you select this option, no style will be applied.
- Vertical: if you select this option, a vertical ribbed pattern will be applied.
- Horizontal: if you select this option, a horizontal ribbed pattern will be applied.
- Diagonal Left: if you select this option, a diagonal left ribbed pattern will be applies.
- Diagonal Right: if you select this option, a diagonal right ribbed pattern will be applied.
- Left Seal Style: here you can define the style of the
left seal. Options:
- None: if you select this option, no style will be applied.
- Vertical: if you select this option, a vertical ribbed pattern will be applied.
- Horizontal: if you select this option, a horizontal ribbed pattern will be applied.
- Diagonal Left: if you select this option, a diagonal left ribbed pattern will be applies.
- Diagonal Right: if you select this option, a diagonal right ribbed pattern will be applied.
- Left Seal Width: here you can define the width of the left seal.
- Rear Seal Width: here you can define the width of the rear seal.
Notches and holes
- Add Tear Notches: if you select this checkbox, a tear
notch will be simulated on the 3D view.
- Shape: here you can define the shape of the
tear notch.
- Select
 for a V shaped tear notch.
 - Select
 for a U shaped tear notch.
- Select
- Location: here you can define where the tear
notch should be located.
- Select Location: Bag Left to position the tear notch on the left side of the bag.
- Select Location: Bag Right to position the tear notch on the right side of the bag.
- Select both Location: Bag Left and Location: Bag Right to position the tear notch on both sizes of the bag.
- Position: here you can specify where the tear notch should be positioned.
- Width: here you can define the width of the tear notch.
- Height: here you can define the height of the tear notch.
- Shape: here you can define the shape of the
tear notch.
- Peg Hole: here you can define if a peg hole will be
created. A Peg Hole is a hole in the package's substrate to mount the
package onto a pegboard hook. Options:
- None: if you select this option, no peg hole will be created.
- Round: if you select this option, a peg hole wit a round shape will be created.
- Sombrero: if you select this option, a peg
hole wit a sombrero shape will be created (
 ).
). - Butterfly: if you select this option, a peg
hole wit a butterfly shape will be created (
 ).
). - Delta: if you select this option, a peg hole wit a delta shape will
be created (
 ).
).
- Position: here you can specify where the peg hole should be positioned.
- Width: here you can define the width of the peg hole.
- Height: here you can define the height of the peg hole.
- Cranulation: if you select this checkbox, the edge of
the top and bottom seal are serrated.
- Width: here you can define the thickness of the prong.
- Height: here you can define the groove size.
Locking Mechanisms
- Locking Mechanisms: if you select this checkbox, a
locking mechanism will be created. A locking mechanism allows you to close a
bag after opening so the content doesn't get spilled or spoiled. Options:
- None: if you select this option, no locking mechanism will be created.
- Innolock: if you select this option, an innolock system will be created. This system consists of two tracks at the top of the top seam that snap in place when squeezing and / or sliding your fingers over the top so the two sides of the bag join together.
- Zipper: if you select this option, an zipper system will be created. This system consists of a plastic fitment that slides back and forth across a track to join each side of a bag together so it closes.
- Position: here you can specify where the locking mechanism should be positioned.
- Height: here you can define the height of the locking mechanism.
- Output File: here you can select the output file. Select the pencil to open Expression Builder.