In Web Page Settings you can define the settings for the
Pagebuilder page.
Select to open
the Web Page Settings. The following options are available:
Title: here you can enter a new title.
Error page url: here you can enter a URL to redirect to
in case the page could not be loaded.
Apply style: if you select the checkbox, the selected
style is displayed in the editor. If you leave this checkbox unselected, the
applied style is hidden and the default style is displayed. However, the
selected style will be applied to your HTML page.
Translations: if you select the checkbox next to
Enable custom translations, the text that you can
enter in the text panel can be translated in the page.
Note: This checkbox is
only available if your web page is part of a MARS app.
Supported languages: here you can define the languages
you want to support for translation.
Note: This checkbox is only available if
your web page is part of a MARS app.
If you select Export to XLIFFs, you can select a
folder where an XLIFF file will be created. This XLIFF file contains
both the source and target language and can be translated using an XLIFF
editor or translation tool. If an XLIFF already exists that has the same
name and the same language combination as the XLIFF file that you want
to export, the XLIFF files will be merged.
If you select Import from XLIFFs, you can select
a folder where the translated XLIFF files are located to import them.
Make sure that the XLIFF files contain the identical language code in
its name, this language should be the same as in the original exported
XLIFF file.
Example 1:
You want to translate the
Submit button in a Pagebuilder form from English
to Spanish and Italian.Follow these steps:
Open the Web Page Settings and select the
checkbox next to Enable custom
translations.
Select the checkboxes next to español and
Italiano. They will be the target
languages. The selected CLOUDFLOW UI language in SETTINGS > SETTINGS > INTERNATIONAL > LANGUAGE is English, so the system automatically selects
English as the source language.
Save the Web Page Settings.
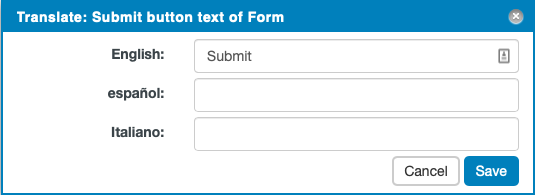
Select the yellow icon in the field Submit button
text:
Enter Submit in the English field.
If you know the Spanish and Italian translation for Submit,
enter the translations and select Save.
The yellow icon has become green in the page:.
Note: The translations are stored in a *.json file in a
subfolder in the assets folder of the MARS App.
If you don't know the Spanish and Italian translations for
Submit, leave the translation fields empty and select
Save.
Open the Web Page Settings and select
Export to XLIFFs.
Select the folder where you want to store the XLIFF files. In that
folder, two XLIFF files are created:
One that contains English as the source language and Spanish
as the target language.
One that contains English as the source language and Italian
as the target language.
You can translate these XLIFF files in an XLIFF tool, or send the
files to a translator.
When the XLIFF files are ready, store them in a folder. Make sure
that the files are called xxx_es.xliff and
xxx_it.xliff.
Open the Web Page Settings and select
Import from XLIFFs.
Select the folder where you have stored the XLIFF files to import
the translations.
If you switch your CLOUDFLOW system to one of the two translated
languages, you will see that the Submit button now has a Spanish or
Italian translation.
Attention: To prevent issues with the translation, you cannot duplicate
Pagebuilder pages (for example with an API call). Each Pagebuilder page has a unique
id, and each component has its own global unique id. Translations refer to those
unique ids. Duplicating a Pagebuilder page results in two pages in which the
translations are linked to the same translation file. If you edit a translation in
the duplicated file, it will also change in the original file.
 to open
the Web Page Settings. The following options are available:
to open
the Web Page Settings. The following options are available: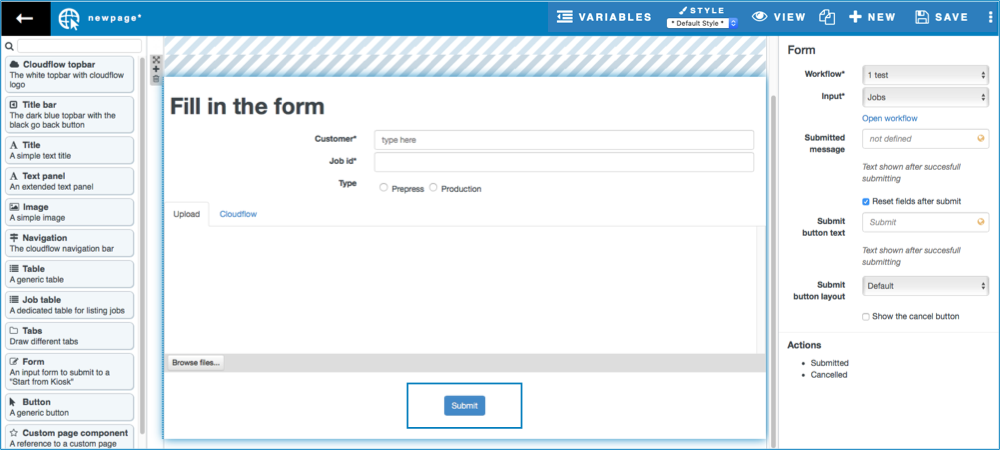

 Note: The translations are stored in a *.json file in a subfolder in the assets folder of the MARS App.